How to Choose Ski Bindings
Binding Types & Styles
Scoring a pair of older but pristine skis at ski swap can give you serious shopper’s high and make your season, but shopping for ski bindings gets a little trickier.
There’s no pretty topsheet, no stiffness to test, no sidecut to eye; there are only mysterious inner workings. But don’t be intimidated—at the end of the day, all you need to know is that bindings are what attach your boots to your skis. For most types, this also entails efficient transfer of energy from boot to ski and safe release when you fall, but it’s not rocket science. There are three main types of bindings, and here is how to choose which one is right for you.
The three binding types are: alpine, alpine touring (AT), and telemark—for alpine, backcountry, and telemark skiers, respectively. Recent innovations have produced some bindings that blur boot compatibility, but for general clarity, alpine and AT are discrete categories, and telemark bindings only work with telemark boots.
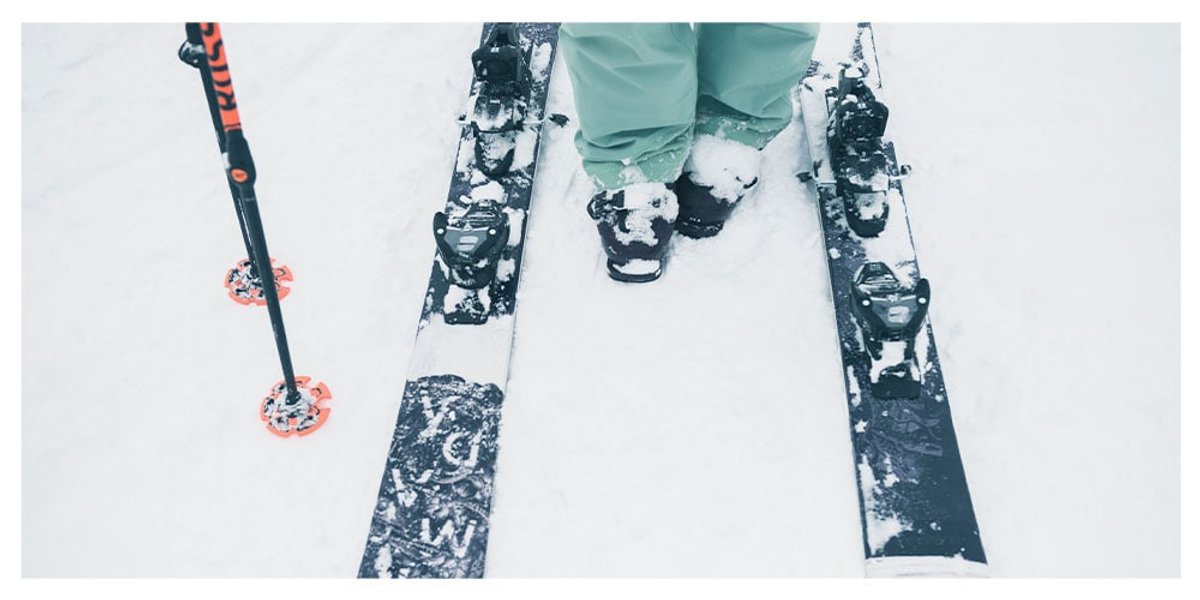
Alpine Bindings
Alpine bindings are traditional downhill bindings, made for alpine boots and general resort skiing. The different models depend on ski style and your preferred DIN, or release setting, which stands for Deutsche Industrie Norm. There are different categories that include freeride, race, all mountain, sport, and junior. Choose the binding in your style and category that has the appropriate DIN range. Your DIN setting is determined by your skier type (usually denoted as I, II, or III, based on skiing style, from least aggressive to most aggressive) and weight (most charts also incorporate age, height, and boot sole length). Beyond the expert level, the DIN setting is even less scientific and depends heavily on personal comfort levels. For example, there are many featherweight but aggressive racers or freeskiers who prefer a high DIN.
Alpine bindings are made to release during a fall, based on the DIN number, in order to reduce the risk of injury. They consist of a toe piece, which includes an anti-friction device (AFD), and a heel piece with a ski brake. Most bindings feature wide-angle, multi-directional, pivoting release for the wicked backward twisting fall. They also feature height adjustment and varying profiles and platform widths to accommodate various boots and wider skis. Brakes come in different sizes, but usually are easy to swap out to fit different skis. When choosing a brake width, select an option that is equal to your ski’s waist width, or up to 5mm wider.
Knowing your general DIN setting is important when selecting a new pair of bindings. To find it, simply take a look at the small window on both the toe and heel of your current bindings. You will see a small mark or line that lines up with a number—that number is your DIN (The heel and toe should both be set to the same DIN). You ideally want your DIN to fall somewhere in the middle of the binding’s range, not at the high or low limit. Reference each binding’s tech specs to view its DIN range. Be sure to confirm with a ski technician or DIN calculator chart if you have any doubts.
Frame AT Bindings
If you love the resort but also occasionally want to get away from the crowds and make first tracks, then AT is a logical option. These bindings generally fit both AT boots and alpine boots and provide a safe touring platform for backcountry skiing. A base plate and frame link the toe and heel, and the binding pivots for free-heel climbing in hike mode. On the descent, the binding locks down for alpine-like performance. In recent years, AT setups have made big advances in weight reduction, durability, and performance. You’ve probably even seen AT gear ripping around at the resorts.
These are releasable bindings and operate like alpine bindings, with multi-directional, multi-pivot release, and an adjustable DIN range. You choose them in a similar way, taking into account preference and comfortable DIN accommodation. AT bindings come with different brake widths, but, again, these can be easily changed.
Tech Bindings
While Frame AT bindings are versatile, they can be on the heavier side. For this reason, most dedicated ski tourers prefer Tech AT bindings. Tech bindings don’t typically have a full ISO/DIN-certified release rating, and some lack brakes to save weight while skiing uphill. Furthermore, these bindings require the use of alpine touring-specific boots that have special steel fittings to create a solid boot-to-binding interface.
In recent years some brands like Salomon and Atomic have introduced Shift bindings, which blend the touring efficiency of pin bindings with the downhill performance of an alpine binding, giving you the best of all worlds. The innovation never stops.
Telemark Bindings
As they say, “Free the heel, fall on your face” … or something like that. Don’t believe it—telemark skiing is an old and beautiful free-heel ski style that can take you into the backcountry but also perform inbounds. The bindings only work with telemark (or tele) boots, but don’t worry—you won’t inadvertently come home with tele bindings, since they look very different from alpine or AT. The tele binding has a fixed toe piece that can come with or without a cable and heel throw. A simple heel plate comes with it and can come with a climbing bar for easy hiking. If your boot has a three-pin toe, you can go without the cable and opt for a three-pin toe plate for secure attachment. These cable-free bindings provide the least support and are best for touring in soft snow.
Tele bindings havemade great strides since their introduction in the 19th century. They can now come as releasable (but with a free heel there is no DIN setting) with ski brakes and/or with varying and adjustable cable stiffness for freeride tele skiers. There’s not as much variation with tele bindings as there is with alpine or AT, so the choice is largely based on style preference (e.g., releasable vs. non-releasable and cable stiffness).

Mounting & Maintenance
Mounting your ski bindings means drilling into your skis and should always be done by a certified technician. It requires the bindings, skis, and boots, plus your personal ski info to determine your proper DIN setting if mounting alpine or AT. There are manufacturer-recommended mounting positions, but some skiers prefer a position that’s more forward on the ski or further back. If you’re unsure, talk it over with your shop tech; it’s mostly a personal preference. If you want a riser plate (a raised platform under the binding) or different brakes, bring those in, too.
Ski bindings are maintenance-free but should be adjusted by a certified ski tech each year. You can wipe or hose them down, but cleaning them with soap or solvent is not advised. This process could strip the bindings of the lubricant they need to operate effectively.
Ski bindings should provide peace of mind with an appropriately secure hold while reducing the risk of injury upon a release. If you still have questions about what ski binding is right for you, reach out to one of our Gearheads, who are here to help.